In different IoT projects and applications, notifications or alerts play an important role. Notification/alarms are used to notify the user about something important. Alerts can be in different forms such as LED indication, buzzer indication, vibration, a mobile notification. In this project, we will be exploring ' how to push notification alert using esp8266 and the Blynk app'.
Hardware requirements
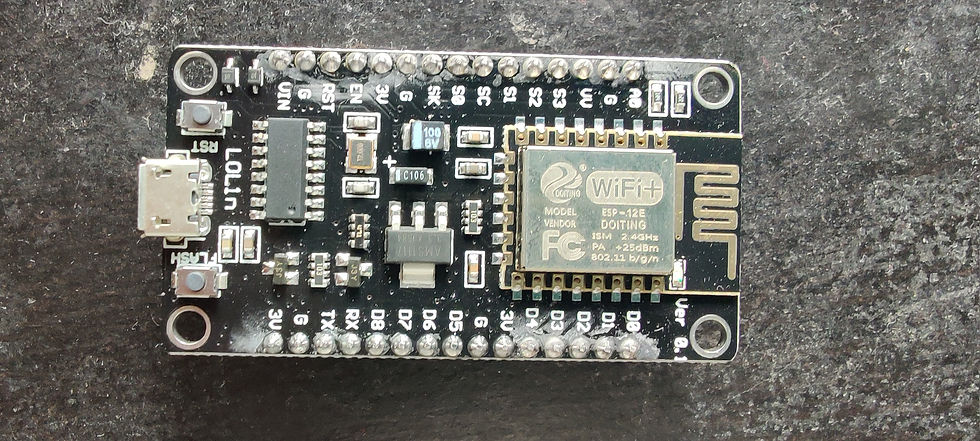
Esp8266 / Node MCU

NodeMCU is an open-source firmware and development kit. It has SoC WiFi.
Input voltage: 7 V to 12 V.
16 digital GPIO pins
1 SPI
1 I2C
2 UART
On-chip RAM - 128kb
On-chip ROM - 4Mb
Ultrasonic sensor.

The ultrasonic sensor transmits sound waves at high frequencies.
The ultrasonic sensor works on the principle of speed = distance/time.
5V DC power supply requirement.
Angle deviation - 15 degrees.
Range - 3 cm to 4 m.
Breadboard

Breadboards are electronic circuit prototyping boards. Breadboards are available in various sizes. Many electronic components such as sensors, actuators, display modules, IoT boards can be interfaced using a breadboard.
Jumper wires

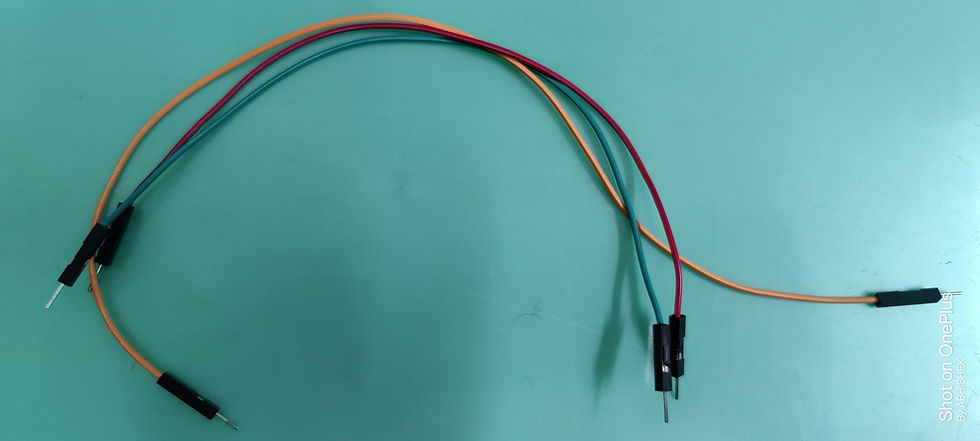
Jumper wires are used for connecting terminals of electronic devices. Jumper wires are used to connect header pins on the circuit boards to each other and the breadboard. Male to male, female to female, and male to female are the types of jumper wires available.
Software
Blynk android application
Blynk is an open-source IoT platform used for monitoring, data analytics, machine learning.
Blynk allows creating amazing interfaces for your projects using different widgets.
Blynk server establishes a connection between hardware and the Blynk app. WiFi, Bluetooth, GSM, USB, Ethernet can be used for connecting to the Blynk Cloud.
Arduino IDE
Arduino IDE is open source software used to write Arduino code, compile and upload it to any Arduino board. Program written in Arduino IDE is called a sketch.
Arduino sketch files are saved with extension .ino. Before compiling, uploading any Arduino sketch, the correct development board and COM port need to be selected.
Many inbuilt libraries and example sketches are also available in Arduino IDE.
Circuit diagram
There are 4 pins on the ultrasonic sensor HC SR 05.
VCC pin of HC SR 04 is connected to VCC pin of esp8266.
GND pin of HC SR 04 is connected to the GND pin of esp8266.
The trigger pin of HC SR 04 is connected to the D2 pin of esp8266.
Echo pin of HC SR 04 is connected to the D1 pin of esp8266.
Procedure on the Blynk app

First of all, create a new project and enter the project name. Now you have to select a widget from the widget box.

Select hardware Node MCU. Select connection type as WiFi. Choose any theme. Now click on 'Create'.

To get the widget box click on the place icon available in the top right corner.
Select a gauge to represent distance. Give a name to gauge as distance, select pin V5 as an input pin. Give label as cm. Select refresh rate, save option is not there these setting get automatically saved.
Select a notification alert from the widget box and keep its settings as default. You will get an authentication token in your mail.
Code
Working:
As we start to run our project. Distance is calculated and sent to the Blynk server. Then the data is sent from the Blynk server to the Blynk app. The gauge on the Blynk app shows distance measured using an ultrasonic sensor. According to our logic in the code, when the distance becomes less than or equal to 10 cm. an alert ( notification ) is shown on the Blynk app. In the alert message, the argument passed in Blynk. notify() function is displayed.
Check the Project Working video here - Mobile Notification using NodeMCu & Ultrasonic sensor | Blynk app | ESP8266 | HC-SR04 | IoT Projects
Video By - Abhishek Goud
Conclusion
In this article, we measured and monitored distance. We used the Blynk IoT platform to push notifications. Similarly, this concept can be used to push notifications in different applications. In different IoT projects, notifications are required to be sent. We can use notifications in projects like temperature measurement, water level monitoring, gas detection, smoke detection, and many more.
See also
Order Electronics Projects
Want us to guide you through your project or make the project for you? Click on the button below or reach out to us via Call/WhatsApp at (+91) - 7600948607
You can -
Order Basic Electronics Projects
Order Embedded Systems Projects
Order IoT Projects
Order FPGA Projects
Order VLSI Projects
Order Image Processing Projects
Order Matlab Projects
Order TinkerCAD Projects
Order Proteus Projects
Click on the button below to fill out the project inquiry form -
Create Various Projects
Check out our Free Arduino Projects Playlist - Arduino Projects
Check out our Free Raspberry Pi Projects Playlist - Raspberry Pi Projects
Check out our Free TinkerCAD Projects Playlist - TinkerCAD Projects
Check out our Free IoT Projects Playlist - IoT Projects
Check out our Free Home Automation Projects Playlist - Home Automation Projects
Check out our Free NodeMCu Projects Playlist - NodeMCu Projects
Follow us -
Please do follow us i.e. #learnelectronicsindia to get daily updates about new blogs, videos, courses, products, offers, competitions, quizzes, and Internship Opportunities.

This blog post on Notification Alert using ESP8266 - IoT is a gem! Learn Electronics India did an outstanding job in presenting the topic in a concise yet thorough manner. The troubleshooting tips and potential challenges covered in the article were a lifesaver. Highly recommended.
Short and effective! LearnElectronics India never disappoints.