
One of the oldest and primarily used methods for displaying decimal numbers in basic electronics devices is 7-Segment #Display. This device is an alternative for the dot #matrix displays which is considered more complex.7- Segment display device is a combination of #LEDs, in particular, 7 LEDs that together form the whole display. The device consists of pins connected to the controllers through the wires.
The article deals with the setting up of the circuit with a 7-Segment Display and interfacing it with Arduino to display the different digits one by one. It describes the working of the circuit along with the code explanation. The article also covers the working and configuration of the 7-Segment Display with Arduino in detail.
Hardware List
The following components are used for building the circuit.

Arduino board is a microcontroller that is used to accept inputs from sensors connected and provide an output action on the desired device connected to it. The sensor inputs can be that from light-detecting sensors, motion sensors (Ultrasonic or IR), temperature sensors, etc. The output function done on the devices can be turning on an LED, the sound of a buzzer, or a Serial monitor display.
Buy Arduino Uno from here.
2. Breadboard

The breadboard is the basic component of any circuit building process. All components, be it input sensors or output display devices are connected to the #Arduino or any other microcontroller using wired connections through a breadboard. The holes in the breadboard are in series. There are various sizes like full-sized, half-sized, and mini breadboards.
Buy Breadboard from here.
3. Resistor

Resistors are passive devices that restrict the flow of current or divide the voltage through the circuit. The resistor used for the proper functioning of this circuit is a 220 Ohm Resistor. The 4-band color code for this resistor is Red, Red, Brown, Gold where Brown color is the multiplier(10) and Gold color shows the tolerance level(±5%).
Buy Resistor from here.
4. Jumper wires
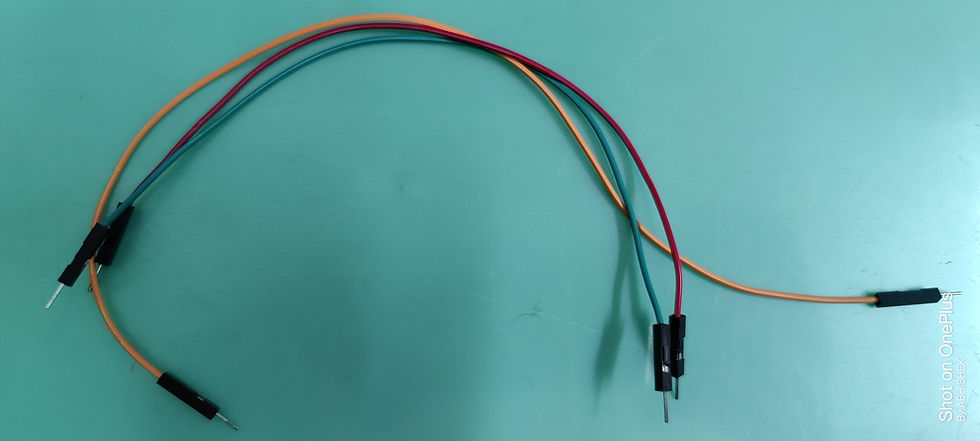
These are the main components that are used to establish the connections between different devices of the circuit.
Buy Jumper wires from here.
It is a set of 7 LEDs arranged in a particular pattern to form digits 0 to 8. There is a separate LED for the decimal point. Each LED is called a Segment and when illuminated they form a digit.
Buy a 7-Segment Display from here.
Circuit Diagram
The circuit diagram below shows the necessary connections from the Arduino to the 7-Segment Display device through the breadboard.
Arduino board is connected to the 7- Segment Display by the Jumper wires. Usually, every output device requires Power or Voltage to work i.e to give the output. In this case, the 7-Segment Display requires a minimal amount of Voltage, which is around 2 - 2.2 Volts. This range of Voltage can be easily provided to the display device from the Arduino itself. Hence there is a requirement for an external battery.
For a better understanding of the circuit, the pin diagram of the 7-Segment Display is provided below.
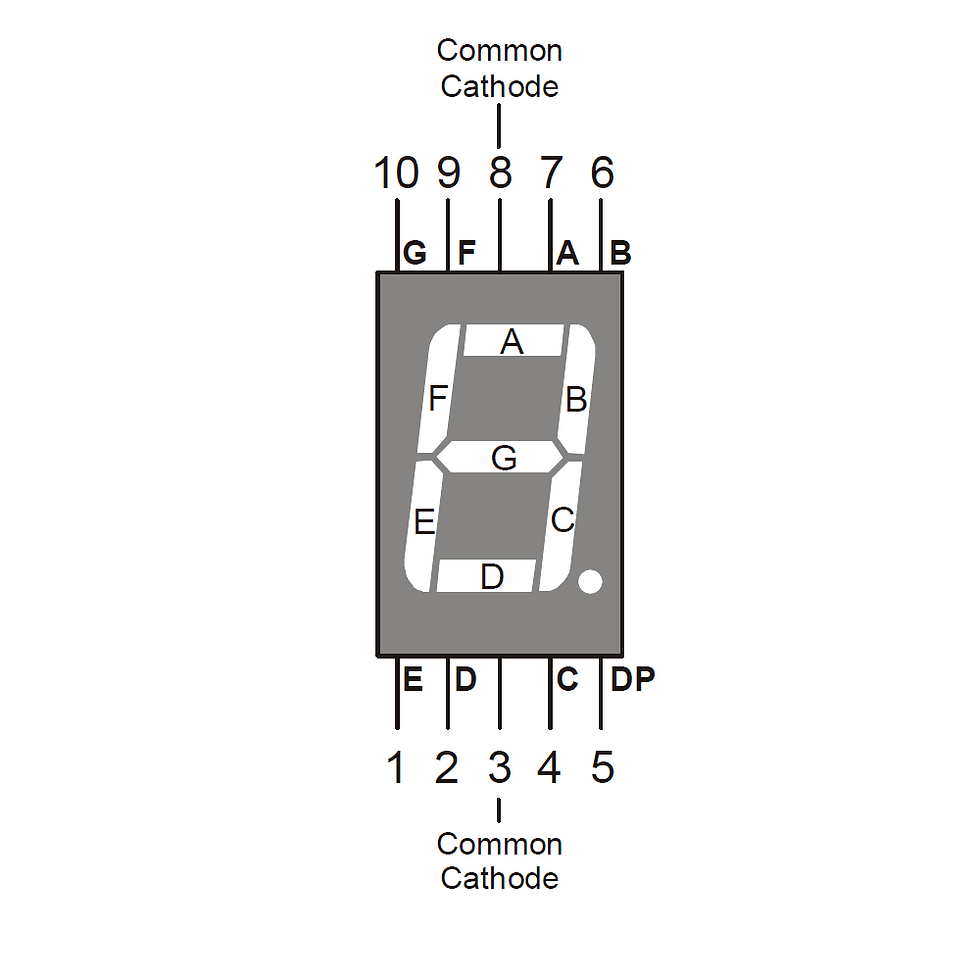
The triggering of each pin of the 7-Segment Display triggers the control of the particular LED part out of the 7 parts named in terms of Alphabets. For Example, Triggering of Pin 10 allows controls the LED named G and it glows. The required number of LEDs can be triggered simultaneously by triggering the corresponding pins.
The circuit connections are as follows. The 220-ohm resistor is connected from the Common Cathode pin of the 7-Segment Display to the GND(ground) pin of the Arduino chip through the Jumper wire. The pins 10, 9, 7, and 6 of the 7-Segment Display are connected to terminals 8, 7, 2, and -3 respectively of the Arduino chip. [10 to 8 | 9 to 7 | 7 to 2 | 6 to -3]. The pins 1, 2, and 4 of the 7-Segment Display are connected to the terminals -6, -5, and 4 of respectively of the Arduino chip. [1 to -6 | 2 to -5 | 4 to 4].
Code:
Working:
The circuit after the connections are done and before interfacing with Arduino is shown below.

Once the connections are done and the code is interfaced with the circuit through the Arduino chip, the circuit receives values of COUNT and follows the conditional ' if ' statements in the code which allows the display of the respective digits.
The circuit below shows one of the output digits on the 7-Segment Display.

The video given below shows an explained version of the circuit building, working of the code, and display of output for better understanding.
Check the Project working video here - Interfacing a 7 Segment Display with Arduino | How to create a simple counter | Countdown display
Video By - Aishwarya Balajee
This article gives a basic idea of #interfacing the 7-Segment Display with Arduino. With the knowledge of the basic connections, many other applications and projects can be explored. The digital clock display, odometers, and calculator display are a few of the applications.
See Also :
Order Electronics Projects
Want us to guide you through your project or make the project for you? Click on the button below or reach out to us via Call/WhatsApp at (+91) - 7600948607
You can -
Order Basic Electronics Projects
Order Embedded Systems Projects
Order IoT Projects
Order FPGA Projects
Order VLSI Projects
Order Image Processing Projects
Order Matlab Projects
Order TinkerCAD Projects
Order Proteus Projects
Click on the button below to fill out the project inquiry form -
Create Various Projects
Check out our Free Arduino Projects Playlist - Arduino Projects
Check out our Free Raspberry Pi Projects Playlist - Raspberry Pi Projects
Check out our Free TinkerCAD Projects Playlist - TinkerCAD Projects
Check out our Free IoT Projects Playlist - IoT Projects
Check out our Free Home Automation Projects Playlist - Home Automation Projects
Check out our Free NodeMCu Projects Playlist - NodeMCu Projects
Follow us -
Please do follow us i.e. #learnelectronicsindia to get daily updates about new blogs, videos, courses, products, offers, competitions, quizzes, and Internship Opportunities.
Learn Electronics India's article on interfacing a 7-segment display with Arduino is simply outstanding! It's evident that they are passionate about teaching electronics and helping others learn. The writing style was approachable and made the technical aspects easy to grasp. Thank you for sharing your knowledge and expertise with us.
Brilliant explanation! Thanks, LearnElectronics India!